
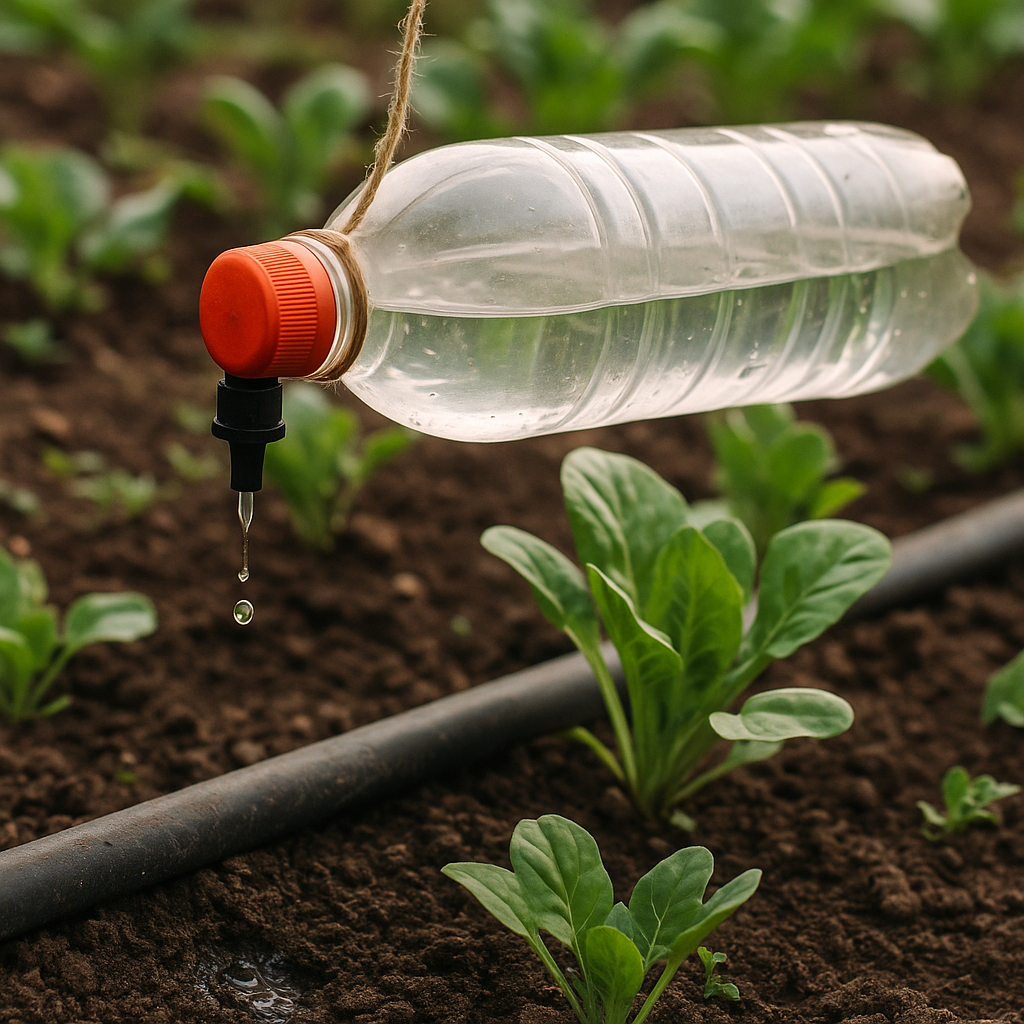
Harnessing the Power of Homemade Drip Irrigation: A Detailed Guide to Efficient Gardening
Drip irrigation represents one of the most effective methods for delivering water directly to the roots of plants. With the growing concern over water scarcity and the need for sustainable gardening practices, the popularity of homemade drip irrigation systems has soared. In this article, we will explore the intricacies and merits of DIY drip irrigation, providing a comprehensive guide that will empower you to create a system tailored to your garden’s specific needs.
What is Drip Irrigation?
Drip irrigation is a micro-irrigation system that delivers water directly to the plant’s root zone, minimizing water waste. Unlike traditional sprinkler systems, which can distribute water unevenly and lead to evaporation, drip irrigation provides a precise amount of moisture at the right time, ensuring that plants receive what they need to thrive.
This method is particularly beneficial in regions prone to drought and is ideally suited for vegetable gardens, flower beds, and orchards. The homemade variant of drip irrigation allows gardeners to customize and optimize the system according to their unique environment and plant requirements.
Why Choose Homemade Drip Irrigation?
1. Cost-Effectiveness
Commercial drip irrigation systems can be expensive to purchase and install. By creating your own system from readily available materials, you can significantly reduce costs.
2. Customization
Homemade systems can be tailored to fit the specific layout of your garden. You can choose the materials, spacing, and design that will work best for your plants and growth conditions.
3. Sustainability
Using recycled materials is a hallmark of many DIY projects. Creating your drip irrigation system can reduce your environmental footprint and make efficient use of resources.
4. Easier Maintenance
A homemade system can be easier to repair and maintain when you are familiar with its components and design.
5. Educational Experience
Creating your own drip irrigation system can be a valuable learning experience. It deepens your understanding of water management, plant needs, and gardening as a whole.
Essential Components of a Homemade Drip Irrigation System
To create an effective homemade drip irrigation system, you’ll need a few essential components. Below, we outline what you need.
1. Water Source
Your garden will need a water supply, whether it be from a hose, rainwater collection system, or even a rain barrel.
2. Main Line
This is the primary tubing that will carry water from the source to different parts of your garden. PVC or polyethylene tubing is typically used for this purpose.
3. Drippers or Emitters
These small devices control the flow of water from the main line. Drippers can range in flow rate, targeting specific plants based on their water needs.
4. Hoses or Tubing
These flexible materials allow you to reach individual plants and deliver water effectively. Soaker hoses can also be an alternative for large areas.
5. Connectors and Fittings
These are essential for connecting pieces of tubing, creating a customized layout for your garden.
6. Filter
To prevent clogging in your drippers, a filtration system can be helpful, particularly if you’re using untreated water.
7. Pressure Regulator
To ensure that water flows at a controllable pressure, necessary for drip irrigation, a pressure regulator can be included in your system, particularly when connecting to city water supply systems.
Step-by-Step Guide to Building Your Own Drip Irrigation System
Creating a homemade drip irrigation system is a highly customizable process. However, the following steps provide a general framework.
Step 1: Assess Your Garden
Evaluate your garden’s size, layout, and types of plants. Calculate the water requirements accordingly. Consider factors like plant spacing, sunlight, and soil type.
Step 2: Gather Materials
Collect the necessary materials, including hose/tubing, connectors, emitters, and any tools needed for assembly.
Step 3: Plan the Layout
Sketch a basic diagram of your garden and plan where the main line will run. Ensure that it reaches all areas where moisture is needed.
Step 4: Install the Main Line
Begin with the main line, laying it out along pathways or edges of the garden. This line can run under mulch or soil to keep it hidden and protect it from sunlight.
Step 5: Attach Tubing and Drippers
Cut lengths of tubing from the main line to individual plants. Attach drippers, placing them at the base of each plant. Be mindful of the specific water needs of different plants.
Step 6: Add a Filter and Pressure Regulator
Place a filter and a pressure regulator at the beginning of the main line to ensure clean water flows at an appropriate pressure.
Step 7: Test the System
Turn on the water supply to test your system. Check for leaks in connections and ensure that each emitter is distributing water properly.
Step 8: Monitor and Adjust
Observe how your plants respond over time, adjusting dripper flow rates and layout as necessary to ensure optimal growth.
Frequently Asked Questions about Homemade Drip Irrigation
Q1: How long should I run my drip irrigation system?
A: The duration depends on your plant’s needs and local climate conditions. Generally, 30 minutes to an hour several times a week is a good starting point. Monitor soil moisture to adjust the frequency and duration as necessary.
Q2: Can I use a rain barrel for drip irrigation?
A: Yes! Rain barrels are an excellent source of water for drip systems. Just ensure that your setup can accommodate gravity-fed water flow.
Q3: What types of plants benefit most from drip irrigation?
A: Almost all garden plants will benefit, but those that thrive with consistent moisture levels—like tomatoes, peppers, and melons—are particularly well-suited for this system.
Q4: Can I use soaker hoses instead of drippers?
A: Absolutely. Soaker hoses can cover larger areas and can be beneficial for broader beds. They provide a more uniform distribution of water over a length of the hose.
Q5: How do I prevent clogging in my drip system?
A: Use a filter at the water source and regularly check emitters for clogs. Flushing the system occasionally can also help maintain clear pathways for water flow.
Q6: What if my water pressure is too high for drip irrigation?
A: This often requires the installation of a pressure regulator at the beginning of the mainline. This tool helps maintain a consistent and appropriate pressure level.
Q7: Is it possible to automate my drip irrigation system?
A: Yes! You can integrate a timer or smart irrigation system to automate watering, optimizing water usage according to weather conditions and soil moisture levels.
Q8: What materials work best for homemade drip systems?
A: PVC pipes, polyethylene tubing, and garden hoses are suitable materials for the main line. Emitters can be commercial-grade or homemade using simple pinholes in a standard hose.
Q9: Is there a need for winterization?
A: Absolutely! If you live in an area with frost, drains your system and remove the hoses to prevent damage.
Benefits of Drip Irrigation on the Environment
-
Water Conservation
Drip irrigation can reduce water use by up to 50% compared to conventional watering methods. This is particularly important in water-scarce areas. -
Reduced Soil Erosion
By minimizing runoff, drip irrigation protects the soil structure and helps to prevent erosion, fostering healthier soil ecosystems. -
Lower Energy Consumption
By utilizing gravity-fed systems and minimizing water usage, less energy is required for pumping, contributing to a lower carbon footprint. -
Improved Plant Health
With a consistent water supply, plants can thrive with fewer incidences of water stress, leading to increased yields and reduced pests and diseases.
The Future of DIY Drip Irrigation
The concept of homemade drip irrigation aligns perfectly with the contemporary push for sustainable gardening and food security. As climate change continues to affect water availability, efficient irrigation methods will become increasingly vital. Innovations in materials and technology, such as biodegradable hoses and smart irrigation controllers, will further enhance the capabilities of DIY systems.
Conclusion: Transform Your Garden with Homemade Drip Irrigation
Creating your own drip irrigation system offers a multitude of benefits for both your garden and the environment. By taking a sustainable approach to watering, gardeners can not only improve plant health and yields but also contribute positively to water conservation efforts.
As you embark on your journey of building a homemade drip irrigation system, remember that experimentation is key. Children, family, and friends can make this a collective project, fostering a learning experience while getting your hands dirty in the garden. Your customized irrigation solution will not only help your plants thrive but also reflect a commitment to conscientious gardening practices.
Grow smart, grow sustainable – and let the drip irrigation flow!